Whole Grain Whole Wheat Bread – Two Loaves
 This is essentially the same recipe as a previous post for one loaf of whole grain whole wheat bread except that the amounts of the ingredients have been adjusted for two loaves instead of one. There is another difference in that the recipe for one loaf is for a 9 x 5 inch loaf pan and this recipe uses two 8 1/2 x 4 1/2 inch pans. The pans are slightly smaller so the recipe is not double the amounts of the recipe for one loaf. This recipe has been adjusted to be in proportion to the smaller pans.
You might prefer baking two loaves at a time instead of one loaf because it takes just about the same amount of time and effort as it does for one loaf and baking two loaves doesn’t require any additional yeast. You use the same amount of yeast for two loaves as you do for one loaf.
There is another slight difference in this recipe. Instead of using only honey as the sweetener, you can also use maple syrup or agave nectar (you can also use the same variety of sweeteners for the one loaf recipe). Be sure to use real, natural maple syrup and not imitation maple syrup. By varying the sweetener, the flour and by using nut milk in place of cow’s milk, you can achieve different flavors.
Once again, make sure to select the best, most wholesome ingredients you can find. Use organic stone ground 100% whole grain whole wheat flour and make sure to buy whole grain whole wheat flour. Don’t be fooled into buying "whole wheat" unless it is whole grain with all the bran and everything else included in the flour. Make sure that the whole grain is included and nothing has been discarded during the milling of the flour. Nowadays, you have to read the food labels carefully and check to make sure you’re not being tricked by deceptive advertising.
The step by step instructions are basically the same as for the one loaf recipe only adjusted for 2 loaves.
Ingredients: Makes 2 Loaves – 8.5 x 4.5 inch pans
- 8 cups organic stone ground 100% whole grain whole wheat flour
- 1 pack (or 2 tsp) active dry yeast
- 2 1/3 cups warm water (110°F – 120°F)
- 3/4 cup milk (or nut milk)
- 1/2 cup sweetener (honey, maple syrup or agave nectar)
- 1/2 cup vegetable oil
- 2 1/2 tsp salt
Mix warm water and honey in a large (6 to 8 quart) ceramic mixing bowl and then sprinkle in the yeast. The yeast will activate best between 110°F – 120°F and the sweetener will nourish the yeast by giving it a meal. Let this set for about 10 minutes to allow the yeast to get foamy at the top.
Next, add the milk and then stir it up with a wooden spoon and then add the flour a little at a time. Don’t add the oil or salt yet. They will be added after the next step. Start by adding about 4 cups of flour and then mix it into a thick batter. Stir in the flour and mix it together really good so all the lumps are gone. Then cover the bowl with a towel and let it rise for about 30 minutes until the dough is spongy and it has doubled in size.
After the dough has risen it should be spongy. Stir it up to deflate it and then add the oil and salt. Stir it in and add a little more flour. If you add the oil and salt too soon, it will inhibit the growth of the yeast. Salt can kill the yeast so you add the oil and salt after the yeast has had a good chance to get growing and multiplying after the first rise.
Add some more flour and keep stirring. Keep adding flour until the dough gets stiff and starts to pull away from the bowl and then turn it out on a floured board for kneading. Slowly and gently begin kneading the dough a little at a time at first. Only add a little bit of flour to the board at a time. Be careful not to add too much flour too fast. It should be pretty sticky at first and it will be sticking to your hands and on the bread board. Just lightly flour the board and the dough when it gets too sticky.
Knead the dough for about 30 minutes while continuing to add flour a little at a time on the bread board. You’re not really measuring the flour. The goal is to knead the dough for about 30 minutes (or even more – there is no set time). Thorough kneading will develop gluten and cause the dough to be smooth and elastic and allow the dough to rise properly. Insufficient kneading won’t make the dough stretchy enough to allow the dough to rise properly and you may end up baking a brick instead of a loaf of bread.
When the dough is stretchy and it no longer sticks to your hands or to the board after 2 or 3 kneads, then it is ready to rise for a second time. Add about a teaspoon of vegetable oil into the bowl and then place the ball of dough into the bowl and turn it over a couple of times so it is coated all over with oil to keep it from sticking to the bowl. Cover it with a towel again and let it rise for about an hour until it has doubled in size again. This is the second rise.
After the dough has risen, punch it down to de-gas it and deflate the dough. Get all the gas out of it. Turn the dough out onto the bread board and allow it to set for a minute or two while you grease each loaf pan.
Grease two 8 1/2 x 4 1/2 inch loaf pans with butter or vegetable oil. Then cut the dough into two equal halves. Shape each ball of dough into a log shape and place it into the loaf pan. It will help if you knead it a few times before shaping it. Pat it down real good in the loaf pan and allow them to rise one more time until it has doubled in size again. This is the third rise. This can take anywhere from 30 minutes to an hour depending on the temperature, how well the yeast got started, how well the dough was kneaded and the quality of the flour.
Just before the dough has finished rising, preheat the oven to 350°F. Bake at 350° for about 45 minutes. Afterwards, pop the loaves out of the pans and set them aside and allow them to cool.
Start by heating the water up on the stove in a small saucepan. While it is heating up, measure out 1/2 cup of maple syrup, honey or agave nectar in a large mixing bowl. A ceramic mixing bowl is best because it holds the heat better and helps the yeast grow.
After a few minutes and long before the water begins to boil, add it to a measuring cup with a yeast thermometer. Measure out 2 1/3 cups of warm water. The temperature is just right when it is at 120°F because you’ll be adding it to the sweetener, which is cooler and it will bring the temperature down a little bit, but still between 110°F to 120°F. This is the ideal temperature range for the yeast to activate.
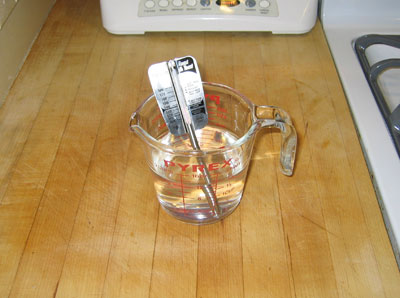
When the water temperature is 120°F, add it to the bowl with the sweetener. Lightly sprinkle the yeast over the top of the water. Allow to set for 10 minutes so the yeast starts multiplying and growing. The yeast will activate between 110°F – 120°F. I prefer the temperature to be at 120°F because by the time some of the sweetener is dissolved it will tend to cool it down a little. After 10 minutes the yeast should look foamy on the top of the water. This is called "proofing the yeast" because the foam is proof that the yeast is alive.
Add the milk and mix thoroughly with a wooden spoon.
Add about 4 cups of flour and mix it into a batter. Don’t add the oil or salt yet.
Keep stirring the flour until there are no more lumps. It is now ready for the first rise.
Cover with a towel and let stand for about 30 minutes. All the rising should be done at room temperature – not too cold and not too hot.
After rising, the dough should be about double in size and it should have a spongy texture. This is the "sponge method" of making bread. The dough will be spongy and the first rise gives the yeast a chance to really get growing.
Stir it so the dough deflates and then add the oil and salt and stir everything to mix thoroughly.
Add some more flour a little at a time and keep stirring. When it becomes difficult to stir and it starts to pull away from the sides of the bowl, then it is time to transfer it to a floured bread board and start kneading.
Turn the dough out onto a floured bread board or counter. Sprinkle a little flour on the dough, also. As you knead the dough it will take up more flour and become less sticky and should gradually become smooth and stretchy.
Gradually knead the dough very gently at first and slowly add a little bit of flour at a time to the board or counter. You want to give it a chance to develop gluten and not add too much flour or add it too fast. If you add too much flour or add it too fast, the bread may turn out crumbly like cake. Kneading takes practice and patience.
Continue to knead the dough, pushing it out across the surface while pressing down. Kneading can take about 30 minutes or longer. The important thing is to have the right balance of water and flour. You want the dough to be very stretchy and smooth after a thorough kneading.
When the dough is smooth and stretchy and no longer sticks to your hands or to the counter after 2 or 3 kneads, it will be ready for a second rise. Form it up into a ball.
Add a little oil (about a teaspoon) to the bowl and then place the ball of dough into it. Turn it over a few times so it is completely coated with oil and won’t stick to the bowl.
Cover with a towel and allow to rise for about an hour. This is the second rise.
The dough should double in size after about an hour.
Punch it down to deflate the dough and get rid of all the gas.
Turn the dough out onto the board and let it stand for a minute or so.
While you are waiting, grease the 8 1/2 x 4 1/2 inch loaf pans with vegetable oil or a pat of butter. If the loaf pans are not the "non-stick" variety, then flour them also.
Knead the dough a few times to get rid of any seams or holes, then roll each one out into a log shape, patting the ends back inwards. Keep rolling and patting the ends back until the dough is log-shaped and fits into a regular loaf pan
Place the prepared dough into the loaf pan. Pat it down real good in the pan.
The dough is ready for the third and final rise. Set it aside and allow to rise until it is a little more than double the size. This can take anywhere from 30 minutes to an hour or more.
Allow the dough it to rise until it is about 2 to 2 1/2 times the original size. The amount of time will vary depending on the temperature, how well the yeast reproduced and how thoroughly the dough was kneaded. It should take about an hour to rise. Just before the dough has finished rising, preheat the oven to 350°F.
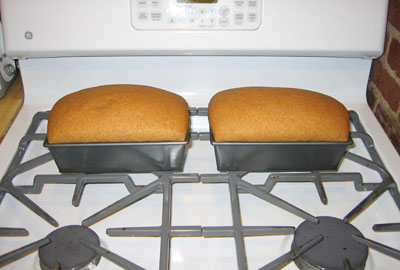
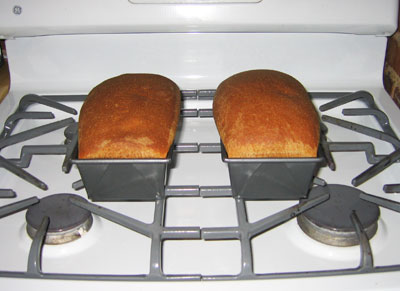
Bake in the oven at 350°F for 45 minutes or until golden brown.
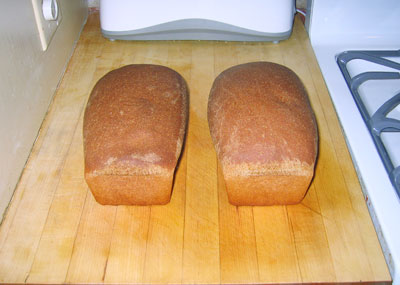
After baking, remove from oven and pop each loaf out of the pan then set them aside and allow them to cool down. This can take about 1 /2 hours to cool completely.
The finished loaves of bread are ready to slice and serve. This is a very delicious recipe and is convenient to make when you bake two loaves at a time. Slice with a bread knife or with an electric knife to make straight, uniform slices.