Archive for the ‘Core Foods’ Category
Chlorella Berry Drink
 Here is a quick and easy recipe for a chlorella green drink with berries. You will need chlorella powder, spirulina powder and black raspberry powder plus some bee pollen (keep in the freezer), some frozen organic blueberries, some raw organic honey and (optionally) some stevia extract if you don’t want to use too much honey.
The stevia extract we have been using comes from Trader Joe’s. It comes in one gram packets and it is fairly inexpensive. Chlorella and spirulina powder is very common and easy to find from health food suppliers. The black raspberry powder we use is Virgin Extracts Black Raspberry Extract Powder. It is made by FoodsSuper.com and is available from Amazon.com and other places.
We use Jarrow Formulas "Yaeyama Chlorella" (1 kg) and Starwest Botanicals Spirulina powder. We buy both of these from from VitaCost.com.
Quick and Easy Broiled Salmon
 This is a quick and easy recipe that you can make in about 10-15 minutes. I like Alaskan Wild Salmon because it isn’t farm-raised. We are able to get ours from Trader Joe’s here in Southern California.
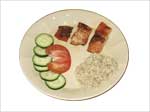
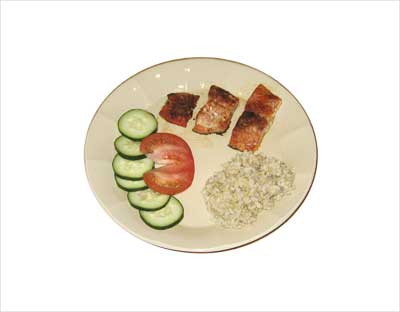
Typically, a 1 to 1 1/2 lb package will make about 3-4 servings. We like to serve it with brown rice and sliced vegetables or with a green salad. This meal is made from good, whole, natural foods.
Ingredients:
- 1 – 1 1/2 lbs Wild Alaskan Salmon
- Paprika
- Garlic powder
- Lemon slice
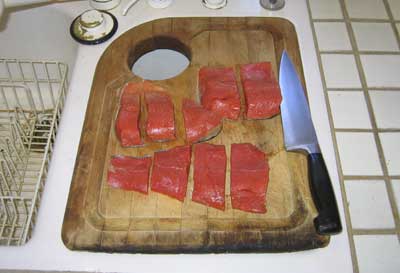
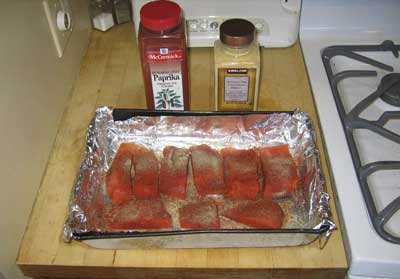
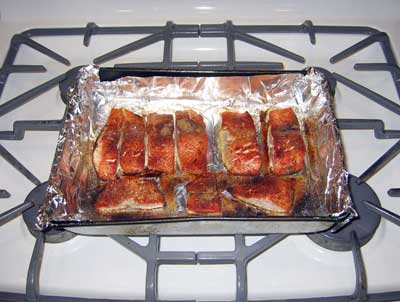
Cut salmon into small slices and place in a shallow foil-lined pan. Cutting salmon into small slices will make slightly crispy edges and good texture. Sprinkle with parika and garlic powder. Broil on high for about 10 minutes. When salmon is cooked, remove from broiler and fold the foil over to enclose the cooked salmon and allow it to steam for about 5 minutes to make it tender and juicy. Cooking time will vary according to the thickness of the salmon. Garnish with lemon slice.
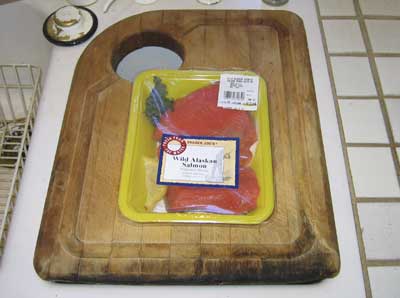
Shown below is a photo of the package of salmon on a cutting board. This is just over 1 lb. We like Wild Alaskan Salmon.
Cut the salmon into small slices for slightly crispy edges and a nice texture.
Place in a foil-lined pan and sprinkle with paprika and garlic powder.
Broil on high for about 10 minutes … cooking time will vary according to the thickness of the salmon. Folding the foil over to completely enclose the salmon and allowing to steam for about 5 minutes will help make it more tender and juicy.
Serve with green salad or sliced vegetables or brown rice. Shown below with sliced cucumbers and tomatoes with a little brown rice.
Homemade Refried Beans
This is my recipe for homemade refried beans. There are numerous recipes for refried beans. The traditional fat used has been lard. Finding a good source for healthy lard is not easy. You need to know a butcher that can get it for you. Refried beans are excellent for healthy eating or for losing weight.
First you will need to cook the pinto beans. You should soak the beans in water overnight, then on the following day it takes about 3-4 hours to cook them. This recipe uses some chili powder, oregano and other seasonings to add spice. You will sauté some chopped onions in a little lard, butter or coconut oil, then add crushed or minced garlic, then add seasonings to gradually infuse more and more flavor. At the end of the cooking you will add some fresh squeezed lime juice. You add it at the end to keep from cooking away the flavor.
Fat Free Refried Beans
Ingredients:
- 4 1/2 cups cooked beans
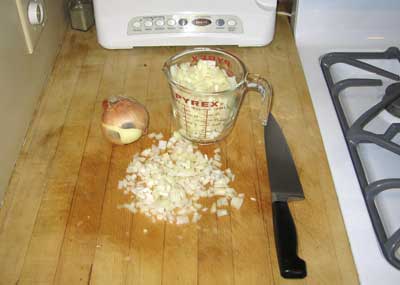
- 1 cup chopped onions (about 1/2 large onion)
- 1 tbsp minced or crushed garlic
- 2 tbsp chili powder
- 2 tsp ground cumin
- 2 tsp salt
- 1 tsp oregano
- 1/2 juice from fresh squeezed lime (juice from 1/2 lime)
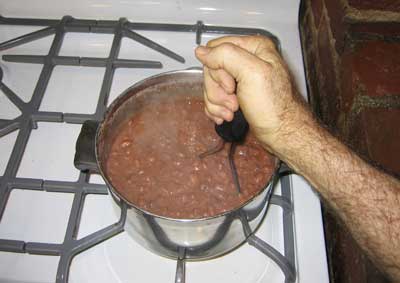
Mash the beans in a bowl with a masher and set aside for now. Add chopped onions to a heavy skillet and cook until soft and beginning to brown a little. Add 1 tbsp of water at a time to keep skillet moist and to keep from burning the onions. Then add garlic and continue cooking until the onions are a light brown color. Add mashed beans to skillet and mix thoroughly, then stir in the chili powder, cumin, oregano and salt. Continue to cook the beans in the skillet and stir with a spatula until it is a thick paste. At that time, add the lime juice and thoroughly mix it into the cooked beans. Turn off the heat once the lime juice is mixed in to avoid cooking away the lime flavor.
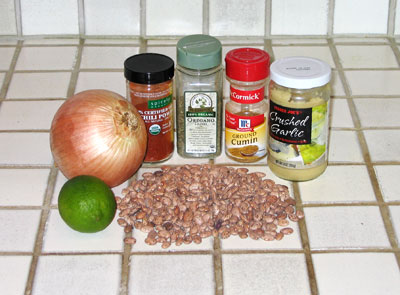
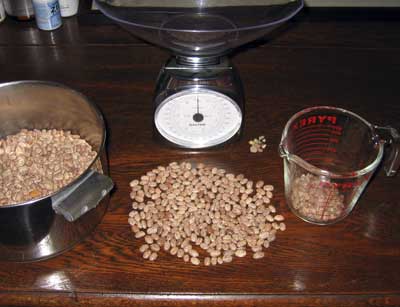
Shown below is a photo of all the ingredients. Starting in the upper right corner and moving counter-clockwise: crushed garlic, ground cumin, oregano, chili powder, onion, lime and dried pinto beans.
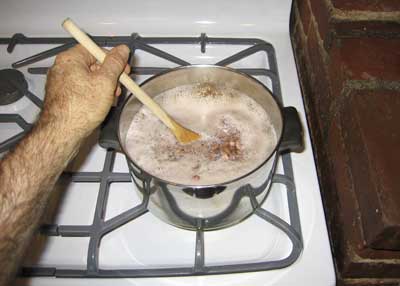
Start by cooking the pinto beans. Please see this post for complete instructions. After cooking the beans, use a masher to mash them while in the pot.
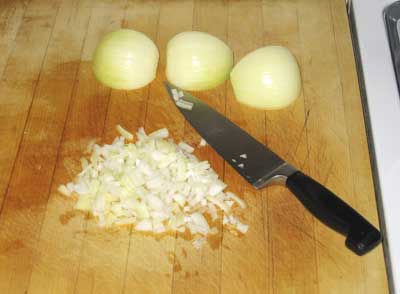
Chop the onions …
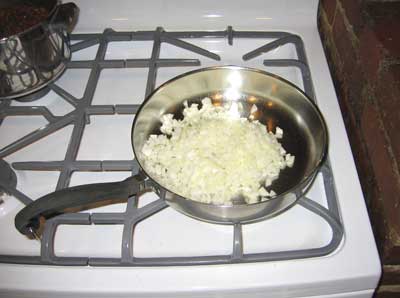
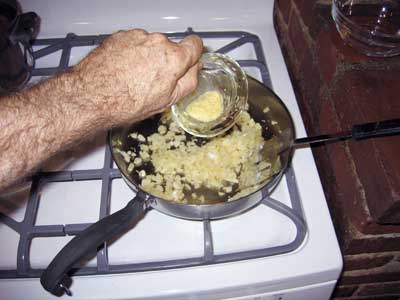
Place the chopped onions in a large skillet.
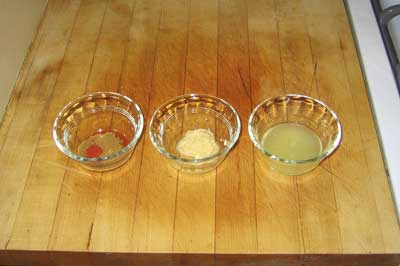
Measure out portions of the other ingredients and set them aside in dishes. Shown below (left to right): all the dry ingredients in the dish on the left (ground cumin, oregano, chili powder and salt), then crushed garlic in the middle dish followed by fresh squeezed lime juice in the last dish.
Sauté the chopped onions in water, gradually adding more water as necessary – about a tablespoon at a time – to keep the onions from sticking to the skillet or burning. After cooking for about 8 minutes, add the crushed garlic.
Continue to cook the vegetables for about 2 minutes more. Just infuse the flavors into the vegetables.
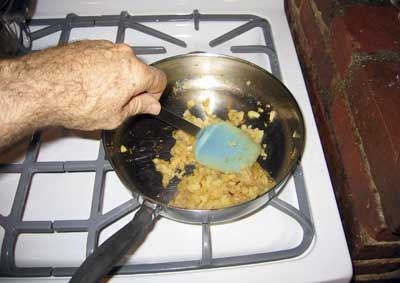
When the onions and garlic are cooked, add the mashed beans.
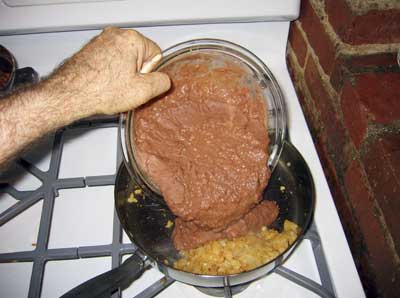
Use the masher or wooden spoon and continue to cook the vegetables and mashed beans together. After a minute or two, add the dry seasonings (ground cumin, oregano, chili powder and salt).
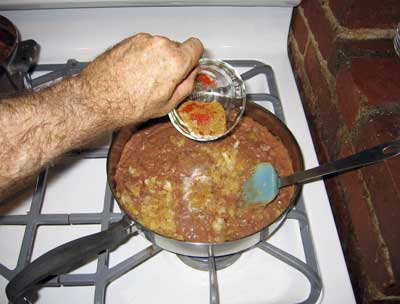
Continue to cook and stir the mashed beans with a masher or wooden spoon for another minute or two, then add the fresh squeezed lime juice.
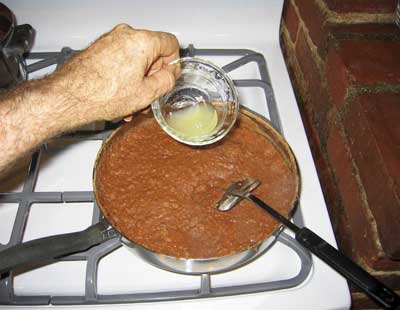
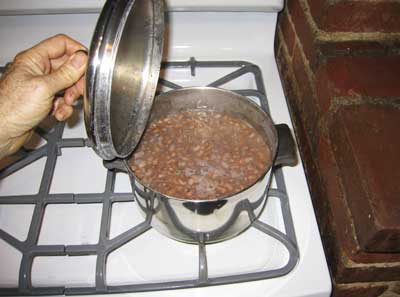
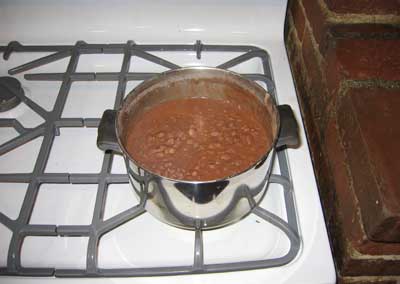
Using the masher, thoroughly mix the fresh squeezed lime juice throughout the mashed beans. When everything is all mixed together, the refried beans will be done.

How To Cook Pinto Beans
Pinto beans are among the most common staple foods in many cultures. They are very healthy and inexpensive. Pinto beans are the most highly consumed dried bean in the U.S.A. and the are very easy to cook. Pinto beans are an excellent source of protein – especially when combined with rice. Proteins are composed of amino acids. The body can produce all but 10 amino acids. These 10 amino acids are called “essential amino acids”. Foods containing all of these essential amino acids are called “complete proteins” and foods lacking in certain essential amino acids are called “incomplete proteins”. Some vegetables lack certain essential amino acids but when combined in the same meal with other vegetables containing the missing amino acids, a complete protein will result. Thus, certain combinations of vegetables with incomplete proteins balance each other out to form complete proteins. Beans and rice is one such combination.
In a recent Oprah Winfrey show, Dr. Mehmet Oz and freelance writer Dan Buettner discussed the “blue zones” – areas of the planet where people often live to be 100. Dan Buettner emphasizes what he calls the “Mesoamerican trifecta” — the predominant diet in much of Central America for the last 3,500 years. Mr Buettner states that “The diet consists of lightly salted corn tortillas, beans and squash” … which is “arguably the best longevity food ever invented.” Pinto beans are good for heart health, they are very high in fiber and help to stabilize blood sugar levels, thereby keeping you from getting hungry.
Fat Free Pinto Beans
- 3 1/2 cups pinto beans
Sort through the beans and pull out any stones or shriveled beans. Add beans to a pot with a lid. Add water to cover beans with 1 to 2 inches of water. You can’t add too much water because you’re going to rinse them the next day, anyway. Let soak overnight in the refrigerator. The next day, rinse the beans. This is an important step because the overnight soaking will pull out an enzyme that causes gas and that enzyme will now be in the water. So you rinse away all of that water along with the enzyme that causes gas so you get rid of it. Now add new water to the pot of beans as needed to just cover them. Heat over medium flame until water starts to boil. Reduce heat to simmer for 2 1/2 to 3 hours. Check water level after about 20 minutes, then every 30 minutes afterwards, adding water as needed to keep water level just to the top of the beans. Do not allow the water to boil away and burn the beans. Stir with wooden spoon occasionally. Cook until beans are soft and the cooking liquid is of good consistency. Never add salt until beans are fully cooked.
Fat Free Pinto Beans
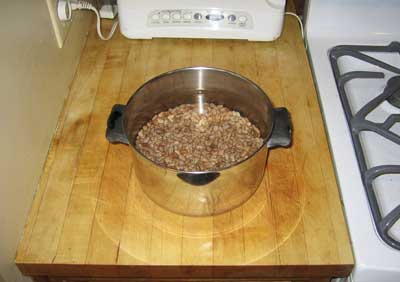
Start with a medium sized cooking pot with lid. I like to cook 3 1/2 cups of dried beans at a time. Measure out the beans and spread them out on a clean, flat surface, then sort through them and discard any stones or shriveled beans.
Cover the beans with 1 to 2 inches of water. Add as much water as you want. You can’t add too much water at this step. Place the lid on the pot and set the beans in the refrigerator and allow to soak overnight.
The next day, rinse away all of the soaking water and add new water. This step will get rid of all the enzyme that causes gas because the soaking water will contain the enzyme. Add enough new water to just cover the beans.
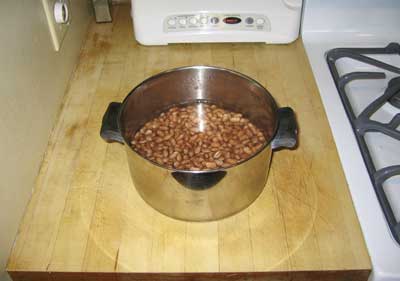
Place the pot over a flame and bring water to a boil, then reduce to a very low flame. Allow to cook for 2 1/2 to 3 hours.
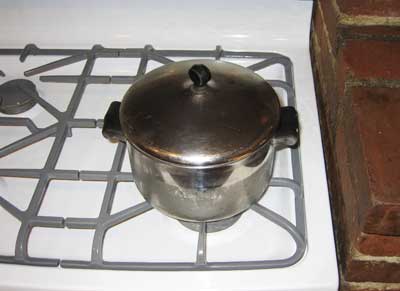
Shown below is a photo taken just after water begins to boil and just before reducing the flame. Stir occasionally, checking the water level periodically and adding more water as necessary to just cover the beans during cooking. It has been my experience that water needs to be added around the first 20 minutes after boiling.
During the last 30 to 45 minutes, there may be a tendency for the beans to stick to the pan, so be careful around this time. Stir the beans and make sure the flame is very low and that the water level covers the beans.
The beans should be fully cooked in no more than 3 hours. Once you have cooked the pinto beans, you can make them into refried beans, or you can allow to cool and place in a covered container in the refrigerator. You can also freeze some of them if you like, then place in the refrigerator after thawing.
Delicious Split Pea Soup
 This is a recipe for split pea soup that I accidentally came up with. It started out as a recipe for Green Dal that was printed on a package of split peas. Green Dal is an Indian soup. I was not familiar with Indian cooking at that time. One of the ingredients was Garam Masala. I never bought Garam Masala before. The store was out of Garam Masala that particular day, so I bought Tikka Masala instead. That was a fortuitous accident because the result was really good. Tikka Masala goes really well with really split peas.
This is a very easy soup to make. It takes about an hour and a half. The split peas take an hour to cook, plus another 15 minutes to blend the cooked onions plus some time to chop the onions and prepare the ingredients. This is also a very healthy recipe. It will give you lots of energy without making you hungry.
Delicious Split-Pea Soup
- 1 cup Organic Green Split Peas (dry)
- 3 cups water
- 1 tsp. Sea Salt
- 2 cups chopped yellow onions
- 3 cloves garlic, finely chopped
- 1 tbsp. Tikka Masala Sauce
- 1/4 tsp. pepper
- Salt to taste
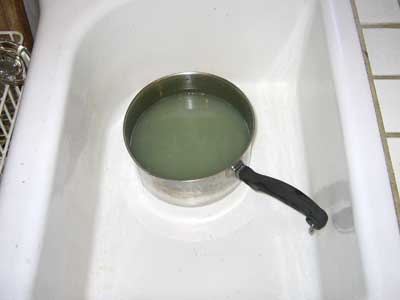
Rinse and sort peas, drain and place in a medium saucepan with 3 cups of water, tsp. sea salt and l/2 cup of the chopped onions.
Bring to a boil, reduce heat, cover and simmer for about 1 hour until the peas are tender.
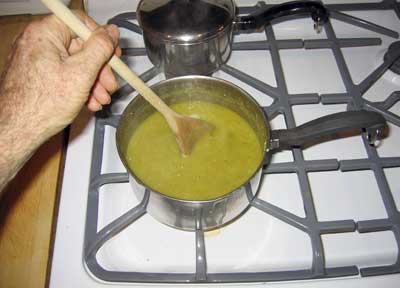
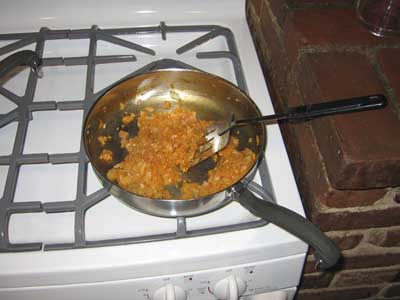
While the peas are cooking, sauté the remaining onion with a little butter or coconut oil along with the garlic and Tikka Masala Sauce in a skillet. Add a little water if needed. Cook over medium heat, stirring occasionally until they are soft and just beginning to turn golden brown (about 10-15 minutes).
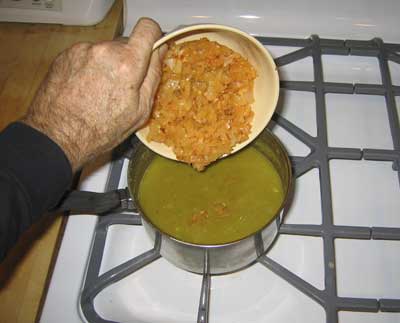
When the peas are cooked, add the sautéed onion mixture, stirring to combine. Simmer 10-15 minutes to blend flavors. Season with salt and pepper.
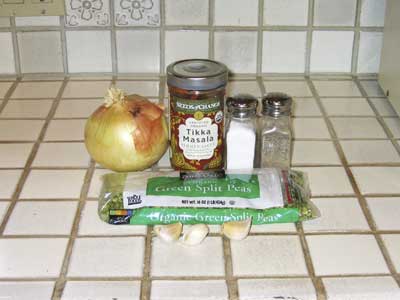
Shown below is a shot of all the ingredients. Starting in the back row and going clockwise: onion, Tikka Masala sauce, salt, pepper and dried split peas. These are organic split peas, but you can make the recipe with conventional split peas.
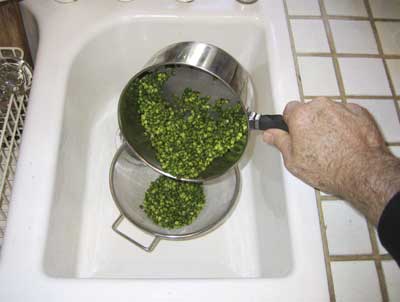
Measure out the split peas and place into a pot. Rinse thoroughly. As you can see by the cloudy color of the water, you will have to rinse them about 8 to 10 times.
Pour the rinse water out through a strainer after each rinse.
Quarter the onion, then peel and chop it. Place 1/4 of the chopped onions (1/2 cup) into the pot with the split peas.
Cook the split peas and chopped onions for 1 hour. Cook them slow over a low flame. Stir occasionally to keep from sticking to the pan. If they start to stick to the pan, then lower the flame.
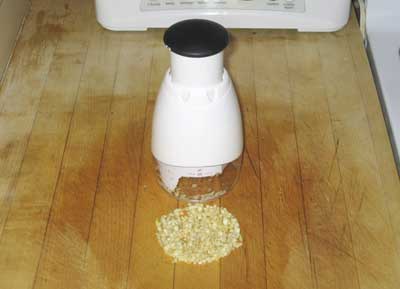
While the split peas are cooking, chop the cloves of garlic. Here I am using a chopper.
Add the remaining chopped onions, chopped garlic and Tikka Masala sauce to a pan. Add a little butter or coconut oil to the pan and start cooking the vegetables. Add more water if necessary to keep from burning the vegetables while they are cooking. Cook them for about 10 to 12 minutes.
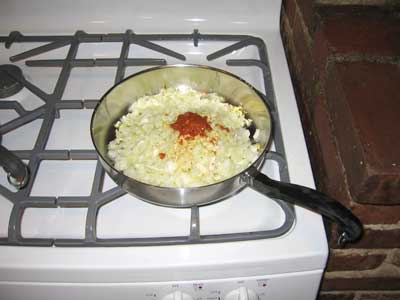
Cook the vegetables until they are soft and light golden brown in color.
After the split peas have cooked for an hour, add the cooked onions plus 1/4 tsp of pepper to the soup. Add salt as needed for taste.
Cook for an additional 15 minutes to allow the flavors to blend thoroughly.
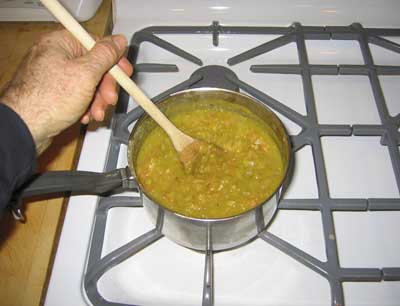
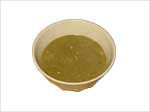
Serve hot. This is a delicious, healthy soup.

Instant Brown Rice Curry
If you like brown rice and if you like curry dishes, then you can spice up a bowl of plain brown rice with a little curry powder and a dash of salt. It’s just a simple thing you can do to add a little variety.
Instant Brown Rice Curry
- 1 cup cooked brown rice
- 1/4 tsp curry powder
- Dash salt
Add 1 cup cooked brown rice to bowl, then mix 1/4 tsp. curry powder and a dash of salt. Serve while hot.
Add a cup of fresh, cooked brown rice to a bowl and mix in 1/4 tsp of curry powder and a dash of salt. This is very quick and easy. If you like curry dishes, you should like this.
Milled Flaxseed
 Milled flaxseed is a good natural food product that is high in Omega 3, Alpha linolenic acid and fiber. I prefer to buy Northern Edge brand because it comes in a vacuum-packed, air-tight re-sealable bag. Once the flaxseed has been flaked, it can become rancid very quickly. This particular brand is carefully milled at a cool temperature to preserve the nutrients.
For example, when making oatmeal, I will add the milled flaxseed after cooking. I will never add it to the boiling oatmeal during cooking.
Bananas
Bananas are a great food you can eat either as a snack or with cereal or even in cooked dishes. They are very high in potassium. They always make me feel feel relaxed. Plus they are a good, high energy food. Bananas are perfect for a healthy eating plan.
Brown Rice
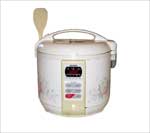 Brown rice is one of the staple foods for a healthy eating plan. Many cultures throughout history have recognized its nourishment value and you will easily find many delicious recipes that use brown rice. We decided to buy a rice cooker (see photo to left) because making rice with a rice cooker is very easy. You simply add measured amounts of rice and water, turn it on and it will cook perfect rice every time – automatically. This is an older model made by the Zojirushi company (a Japanese manufacturer). This model was about $80 several years ago. It has a built in "keep warm" cycle and has push button controls for brown rice and white rice.
Most rice cookers nowadays are fully automatic with a built-in warmer and timer with cooking options for brown rice and white rice. We recently purchased one at Costco as a gift for someone for about $30. That was a pretty good deal, but we don’t have any actual experience with it. Just reading some of the online reviews, Zojirushi models seem to be the best.
If you don’t want to buy a rice cooker, then you will have to use a regular stainless steel cooking pot with a good sealing lid. You add measured amounts of rice and water (approx 1.5 cups of water per cup of rice), then you set the flame high to boil the water and rice. Then you will turn down the flame and partially cover the rice (allow a gap in the lid) to allow steam to escape. After the rice has been cooking for a few minutes, open the lid and look for gaps or holes ("craters"). At this point, put the lid on tight and turn the flame way down low and let it simmer for about 15 minutes. Do not open the lid during this time. Keep it on tight. When the rice is done, open the lid and fluff the rice.
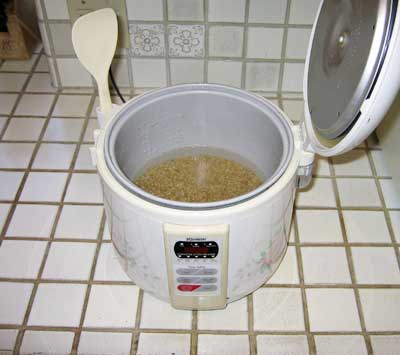
Here’s how to cook brown rice in a rice cooker. Start by measuring out the amount of rice you want to cook. I will be making 3 cups in this example.
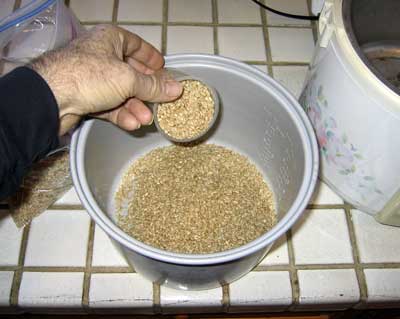
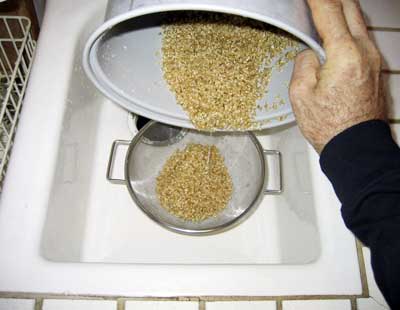
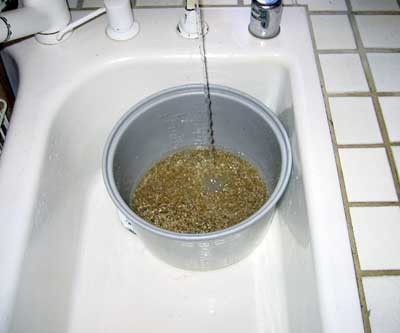
Rinse the rice thoroughly – several times – until the rinse water is clear.

Strain the rice after each rinse … I will usually rinse about 5 or 6 times.
After rinsing, add water. The cooker has marks on the sides of the cooking pot. I will add water up to the 3-cup mark.
Place the cooking pot in the cooker. Here it is just before closing the lid.
Set the cooker for cooking brown rice and push the button to start cooking. This model has a red LED indicating that the rice is cooking and a yellow LED for the rice to "keep warm". Just before the rice is done, the yellow LED will flash, indicating that it is almost finished cooking.
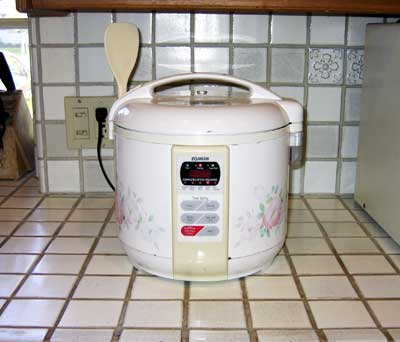
When the rice has finished cooking, this model will beep out loud to alert you. Open the lid and fluff the rice as soon as it is done to allow excess steam to escape. Close the lid back down to keep warm.
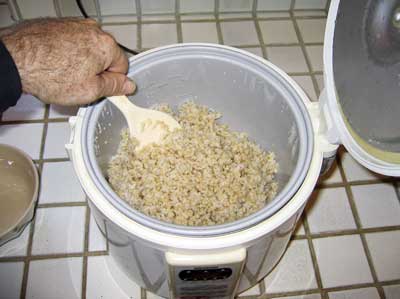
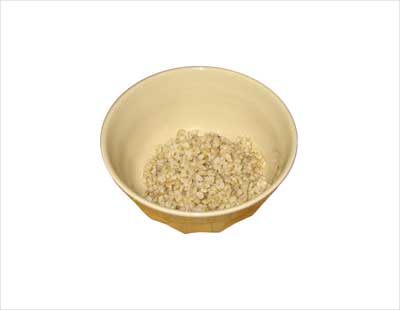
Fluff the rice and serve.
5 Minute Oatmeal
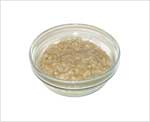 Oatmeal is one of the healthiest foods you can make for breakfast. Studies have shown that it can help reduce cholesterol. It is loaded with fiber and high quality complex carbohydrate. Make sure when you buy oatmeal that you buy whole oats – not instant oats. Instant oats are pre-cooked and much of the fiber and nutrients are lost in the process. Also I prefer rolled oats, not steel cut oats. Besides the fact that I prefer the flavor of rolled oats over steel cut oats, it’s been my experience that steel cut oats takes 20 – 30 minutes to cook, while it only takes 5 minutes to cook rolled oats.
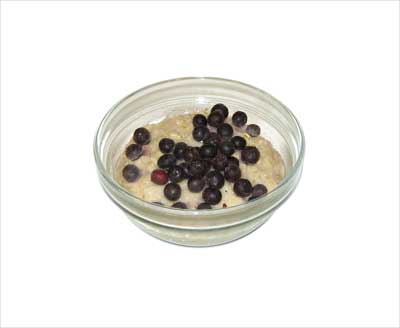
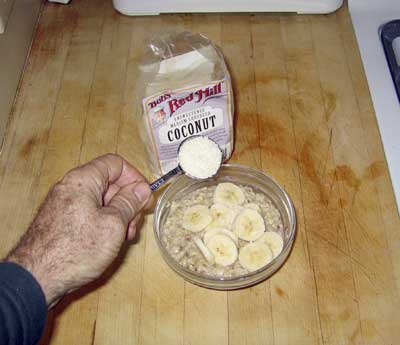
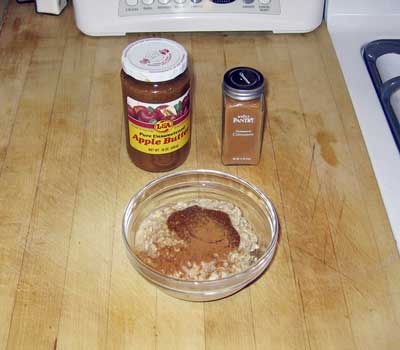
You can add toppings to your oatmeal to make a more delicious meal. I try to keep a supply of frozen fruit and berries, plus some fresh fruit like apples or bananas. Blueberries are great because they are loaded with antioxidants. Other good toppings are all natural apple butter (made without sugar), unsweetened shredded coconut and raw nuts (raw almonds, pecans or walnuts – halves or chopped). Remember to always use raw, uncooked nuts and natural products made without sugar. Roasting nuts introduces trans fats which are bad for you. Raw nuts contain good, healthy fats.
5 Minute Oatmeal
- 1 cup water
- 1/2 cup old fashioned oats (not quick oats)
- Dash salt
- Sweeten with Stevia Extract, Raw Honey or Blue Agave Syrup
Optional, but very beneficial:
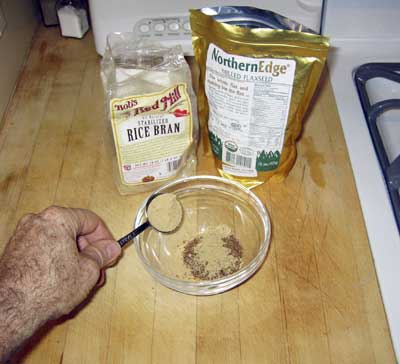
- 1 tbsp Rice Bran
- 1 tbsp Milled Flaxseed
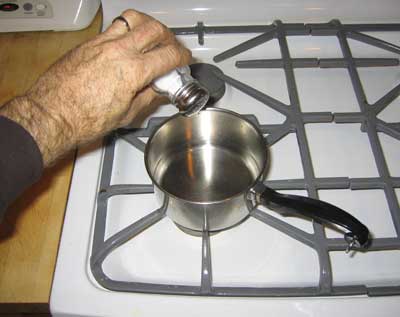
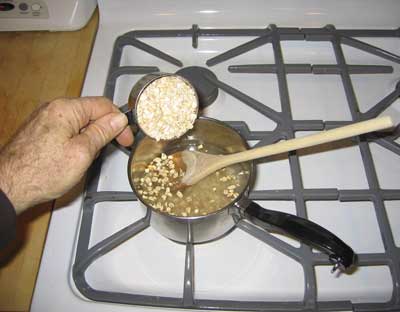
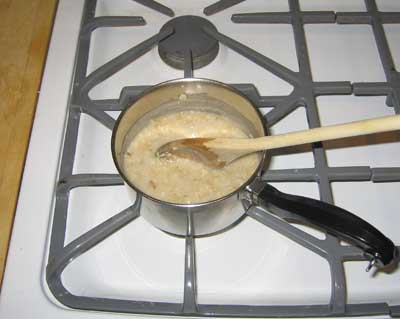
Add water to saucepan. Add salt to water, then stir briefly and add oats. Bring to boil, reduce heat and simmer for about 5 minutes stirring occasionally. Oatmeal will be cooked when starch has formed around edges and oatmeal has thickened. Add dry goods – rice bran, milled flaxseed and dry sweetener to a dry bowl, mix together then add cooked oatmeal. Add toppings and enjoy!
Toppings / Combinations:
- Apple butter with a dash of cinnamon plus chopped raw almonds, pecans or walnuts
- Apple slices with a dash of cinnamon
- Peach slices with ground nutmeg / cloves
- Banana slices with unsweetened shredded coconut
- Blueberries, blackberries, strawberries – fresh or frozen
Start by adding water to a saucepan, then add a dash of salt.
Stir to dissolve the salt, then add the oats, stirring them as you add them. Turn on a high flame after adding the oats.
Stir, then bring the mixture to a boil. Turn down the flame and keep stirring to keep the bottom part from sticking to the pan. The oatmeal will be cooked when it has thickened and starch has formed. You can see the starch forming when the fiberous part of the oats break down.
I like to add a tablespoon of rice bran and a tablespoon of milled flaxseed plus a little Stevia extract for sweetening. Stevia is more healthy than sugar. Instead of adding the rice bran and flaxseed to the bowl, sometimes I will just add it to the cooked oatmeal in the pan.
After adding the cooked oatmeal to the bowl I will add toppings. One of my favorite topping combinations is shredded coconut and banana.
Another great topping combination is all natural apple butter (made without sugar) and ground cinnamon. I use about a tablespoon of apple butter. You can also sprinkle some chopped raw almonds or pecans or walnuts for a crunchy texture.
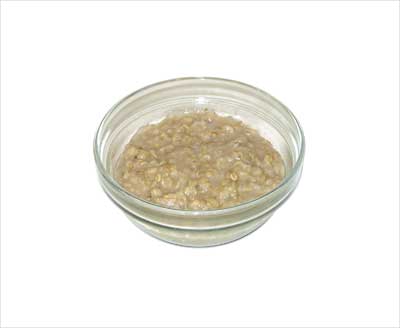
You can always serve it plain – without toppings…
Or you can simply add some fresh or frozen berries … here it is with some bluberries – one of my favorite toppings.