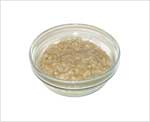
Milled Flaxseed
 Milled flaxseed is a good natural food product that is high in Omega 3, Alpha linolenic acid and fiber. I prefer to buy Northern Edge brand because it comes in a vacuum-packed, air-tight re-sealable bag. Once the flaxseed has been flaked, it can become rancid very quickly. This particular brand is carefully milled at a cool temperature to preserve the nutrients.
For example, when making oatmeal, I will add the milled flaxseed after cooking. I will never add it to the boiling oatmeal during cooking.
Bananas
Bananas are a great food you can eat either as a snack or with cereal or even in cooked dishes. They are very high in potassium. They always make me feel feel relaxed. Plus they are a good, high energy food. Bananas are perfect for a healthy eating plan.
Brown Rice
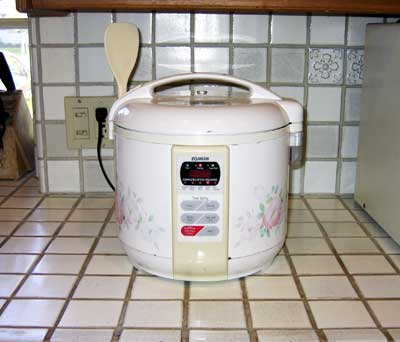
 Brown rice is one of the staple foods for a healthy eating plan. Many cultures throughout history have recognized its nourishment value and you will easily find many delicious recipes that use brown rice. We decided to buy a rice cooker (see photo to left) because making rice with a rice cooker is very easy. You simply add measured amounts of rice and water, turn it on and it will cook perfect rice every time – automatically. This is an older model made by the Zojirushi company (a Japanese manufacturer). This model was about $80 several years ago. It has a built in "keep warm" cycle and has push button controls for brown rice and white rice.
Most rice cookers nowadays are fully automatic with a built-in warmer and timer with cooking options for brown rice and white rice. We recently purchased one at Costco as a gift for someone for about $30. That was a pretty good deal, but we don’t have any actual experience with it. Just reading some of the online reviews, Zojirushi models seem to be the best.
If you don’t want to buy a rice cooker, then you will have to use a regular stainless steel cooking pot with a good sealing lid. You add measured amounts of rice and water (approx 1.5 cups of water per cup of rice), then you set the flame high to boil the water and rice. Then you will turn down the flame and partially cover the rice (allow a gap in the lid) to allow steam to escape. After the rice has been cooking for a few minutes, open the lid and look for gaps or holes ("craters"). At this point, put the lid on tight and turn the flame way down low and let it simmer for about 15 minutes. Do not open the lid during this time. Keep it on tight. When the rice is done, open the lid and fluff the rice.
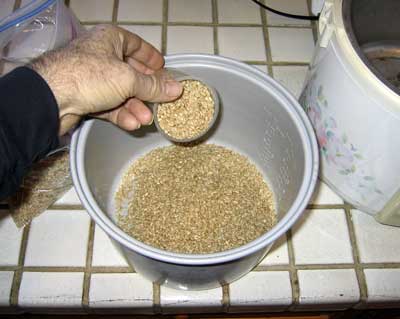
Here’s how to cook brown rice in a rice cooker. Start by measuring out the amount of rice you want to cook. I will be making 3 cups in this example.
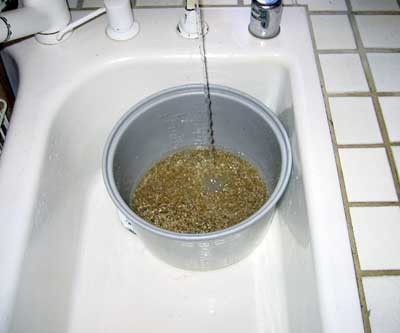
Rinse the rice thoroughly – several times – until the rinse water is clear.

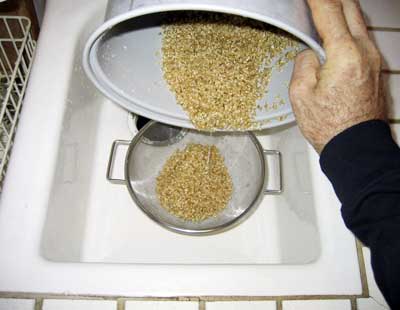
Strain the rice after each rinse … I will usually rinse about 5 or 6 times.
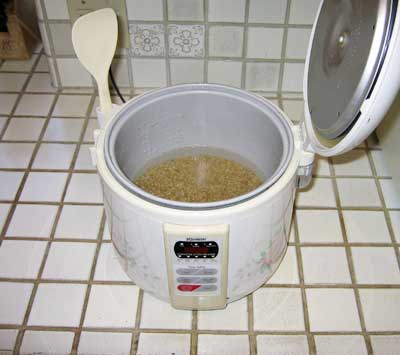
After rinsing, add water. The cooker has marks on the sides of the cooking pot. I will add water up to the 3-cup mark.
Place the cooking pot in the cooker. Here it is just before closing the lid.
Set the cooker for cooking brown rice and push the button to start cooking. This model has a red LED indicating that the rice is cooking and a yellow LED for the rice to "keep warm". Just before the rice is done, the yellow LED will flash, indicating that it is almost finished cooking.
When the rice has finished cooking, this model will beep out loud to alert you. Open the lid and fluff the rice as soon as it is done to allow excess steam to escape. Close the lid back down to keep warm.
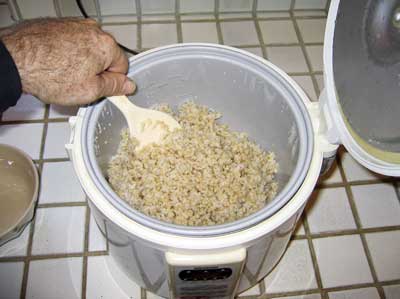
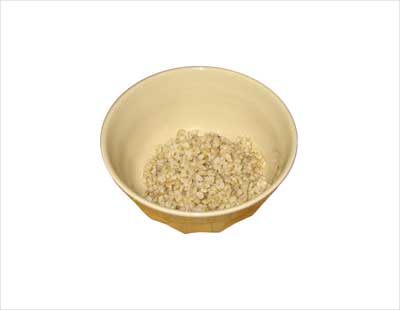
Fluff the rice and serve.
Study Shows Alpha-Lipoic Acid Reduces Triglycerides
At Oregon State University’s Linus Pauling Institute, a study was conducted that demonstrates how Alpha-lipoic acid can be effective in reducing trigycerides. The study was conducted by Dr. Regis Moreau and colleagues (Judy A. Butler and Tory M. Hagen). High triglyceride levels will often occur in obesity and can lead to liver disease, atherosclerosis and premature mortality. Triglyceride levels can be reduced with proper diet and exercise, but these measures are not always effective for everyone.
In the 5-week study, rats were bred to be obese and diabetic. When the rats were 5 weeks old, they were given 200 mg of Alpha-lipoic acid per day per kg of body weight. A control group of rats were given the same diet without the Alpha-lipoic acid. The study showed that although the triglyceride levels in the rats that were given the Alpha-lipoic acid doubled, the triglyceride levels of the control group quadrupled. This demonstrated that Alpha-lipoic acid can be effective in lowering triglycerides.
The study was cited in an articled published February 20, 2009 in the online journal: Archives of Biochemistry and Biophysics (“Lipoic acid improves hypertriglyceridemia by stimulating triacylglycerol clearance and downregulating liver triacylglycerol secretion” http://www.sciencedirect.com). In the article, Dr. Moreau states,”The extent of triglyceride reduction was really dramatic, we didn’t expect it to be this profound.”
5 Minute Oatmeal
 Oatmeal is one of the healthiest foods you can make for breakfast. Studies have shown that it can help reduce cholesterol. It is loaded with fiber and high quality complex carbohydrate. Make sure when you buy oatmeal that you buy whole oats – not instant oats. Instant oats are pre-cooked and much of the fiber and nutrients are lost in the process. Also I prefer rolled oats, not steel cut oats. Besides the fact that I prefer the flavor of rolled oats over steel cut oats, it’s been my experience that steel cut oats takes 20 – 30 minutes to cook, while it only takes 5 minutes to cook rolled oats.
You can add toppings to your oatmeal to make a more delicious meal. I try to keep a supply of frozen fruit and berries, plus some fresh fruit like apples or bananas. Blueberries are great because they are loaded with antioxidants. Other good toppings are all natural apple butter (made without sugar), unsweetened shredded coconut and raw nuts (raw almonds, pecans or walnuts – halves or chopped). Remember to always use raw, uncooked nuts and natural products made without sugar. Roasting nuts introduces trans fats which are bad for you. Raw nuts contain good, healthy fats.
5 Minute Oatmeal
- 1 cup water
- 1/2 cup old fashioned oats (not quick oats)
- Dash salt
- Sweeten with Stevia Extract, Raw Honey or Blue Agave Syrup
Optional, but very beneficial:
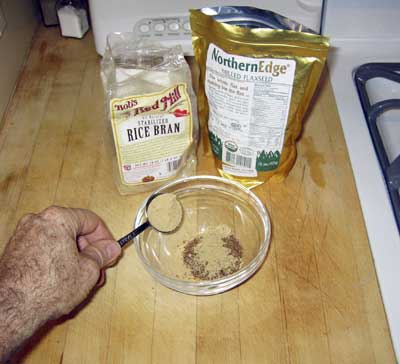
- 1 tbsp Rice Bran
- 1 tbsp Milled Flaxseed
Add water to saucepan. Add salt to water, then stir briefly and add oats. Bring to boil, reduce heat and simmer for about 5 minutes stirring occasionally. Oatmeal will be cooked when starch has formed around edges and oatmeal has thickened. Add dry goods – rice bran, milled flaxseed and dry sweetener to a dry bowl, mix together then add cooked oatmeal. Add toppings and enjoy!
Toppings / Combinations:
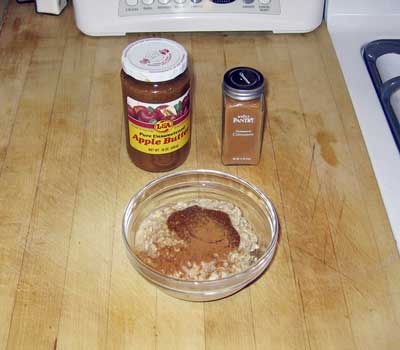
- Apple butter with a dash of cinnamon plus chopped raw almonds, pecans or walnuts
- Apple slices with a dash of cinnamon
- Peach slices with ground nutmeg / cloves
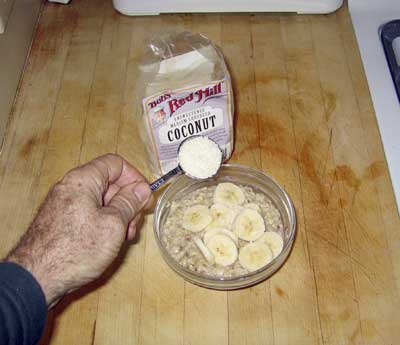
- Banana slices with unsweetened shredded coconut
- Blueberries, blackberries, strawberries – fresh or frozen
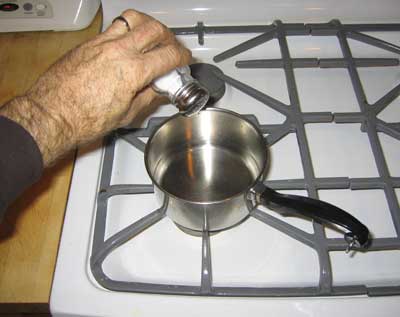
Start by adding water to a saucepan, then add a dash of salt.
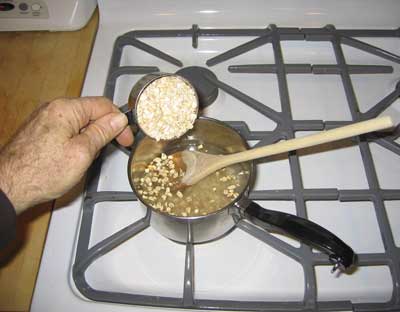
Stir to dissolve the salt, then add the oats, stirring them as you add them. Turn on a high flame after adding the oats.
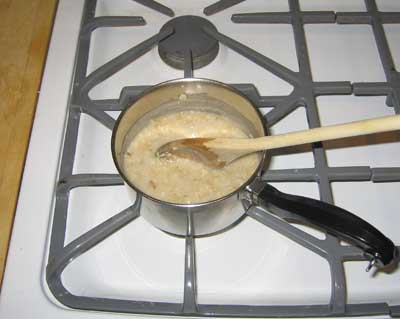
Stir, then bring the mixture to a boil. Turn down the flame and keep stirring to keep the bottom part from sticking to the pan. The oatmeal will be cooked when it has thickened and starch has formed. You can see the starch forming when the fiberous part of the oats break down.
I like to add a tablespoon of rice bran and a tablespoon of milled flaxseed plus a little Stevia extract for sweetening. Stevia is more healthy than sugar. Instead of adding the rice bran and flaxseed to the bowl, sometimes I will just add it to the cooked oatmeal in the pan.
After adding the cooked oatmeal to the bowl I will add toppings. One of my favorite topping combinations is shredded coconut and banana.
Another great topping combination is all natural apple butter (made without sugar) and ground cinnamon. I use about a tablespoon of apple butter. You can also sprinkle some chopped raw almonds or pecans or walnuts for a crunchy texture.
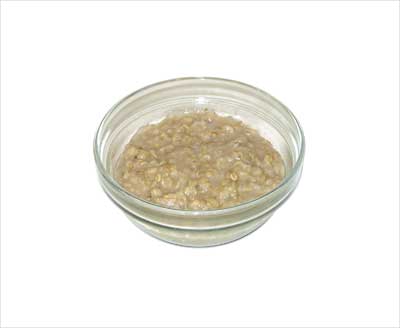
You can always serve it plain – without toppings…
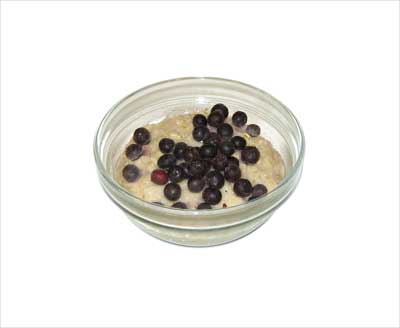
Or you can simply add some fresh or frozen berries … here it is with some bluberries – one of my favorite toppings.
Steak Fajitas
 Steak Fajitas are very healthy and high in protein. They are easy to make and should go over very well with family and friends. You can serve it with some guacamole which you can also make at home using the guacamole recipe here.
Traditionally, steak fajitas are made with flank steak (or skirt steak), but in this example I am using Flat Iron steak. It is very similar to the more traditional cuts of meat for steak fajitas but it is a lot more tender. We buy grass fed beef from an online source. It is better quality than grain fed beef.
Steak Fajitas Ingredients:
- 2 lbs Flat Iron steak (or flank steak or skirt steak)
- 2 large yellow onions
- 2 large green bell peppers
Marinade:
- Juice from 2 limes
- 1/4 cup olive oil
- 4 cloves garlic, finely chopped
- 1 tsp ground cumin
- 1 Jalapeño pepper, ribs and seeds removed, finely chopped
- 1/2 cup fresh cilantro, chopped (include the stems)
1. Prepare the marinade and steak:
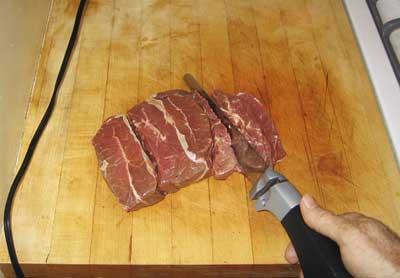
Add all the marinade ingredients to a large glass bowl, and then stir to mix thoroughly. Slice the steak into thin strips – about 1/4 inches thick. Use an electric knife for best results. Cut the strips to about 1 inch wide by 3 inches to 4 inches in length. Add the strips of steak to the marinade in the glass bowl and thoroughly mix together so the marinade is allowed to coat all the pieces of steak. Cover the bowl and place it in the refrigerator. Marinade the steak for at least a couple of hours. For best results, allow to marinade overnight.
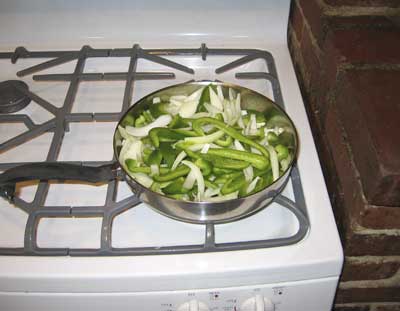
2. Prepare the vegetables:
- Slice the onions lengthwise into 3/8 inch strips. First cut them in half, then into quarters as you would normally slice an onion, but then instead of chopping them cross-wise, slice them lengthwise into strips.
- Slice the bell peppers into 3/8 inch strips similar to the onions. First, cut out the stem, then slice each pepper in half lengthwise, then into quarters, then remove the seeds and ribs, then slice into strips.
3. Cooking:
Grill the steak on a gas grill. Arrange the grill grates by laying them one on top of the other in a staggered fashion so the spaces between the grates are narrow to keep the meat from falling through. Use grilling tongs to turn the meat. While the meat is cooking on the grill, cook the vegetables in a large skillet. Cook the vegetables until the onions are slightly translucent. Both the meat and the vegetables should be done in about 12 to 15 minutes. Turn the vegetables continuously to avoid burning them and turn the meat a few times while grilling. Place the cooked meat and cooked vegetables in separate serving bowls when done.
4. Serving:
Serve portions of meat and vegetables on a plate with 2 flour tortillas, guacamole, salsa and sour cream. Place a couple of strips of meat on a tortilla, then top with vegetables, salsa, guacamole and sour cream. Salt to taste if desired. Roll the tortilla around the ingredients and enjoy! Optionally, serve with cooked pinto beans.
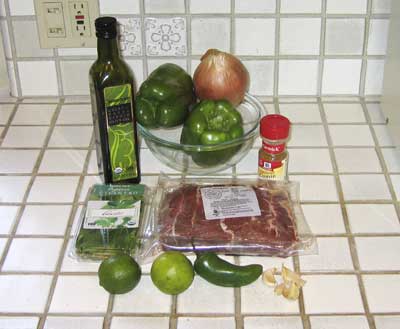
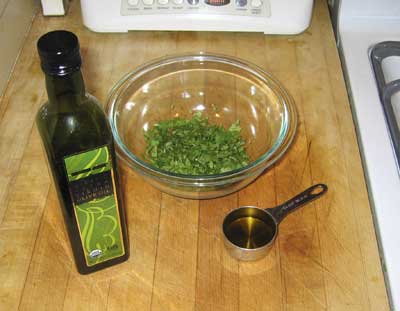
Shown below is a shot of all the ingredients. Left to right, then back to front starting in the back row: olive oil, bell peppers, onions, ground cumin, cilantro, flat iron steak, limes, jalapeño pepper and garlic.
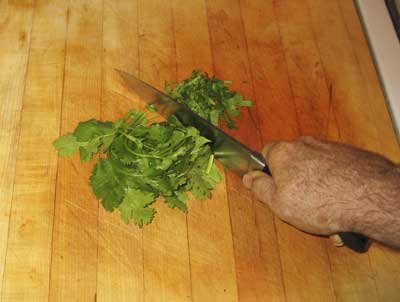
First, prepare the marinade. Begin by chopping the cilantro. Chop it up real fine, including the stems.
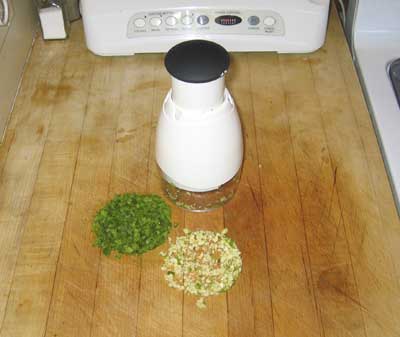
Next, slice the jalapeño pepper, removing the seeds and ribs, then peel the cloves of garlic.

Chop them with a chopper.
Add the chopped cilantro, garlic and jalapeño pepper to a glass bowl, then add the olive oil.
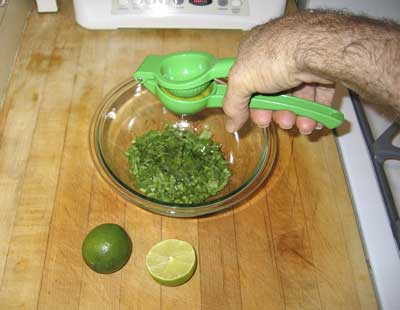
Next, add fresh squeezed lime juice.
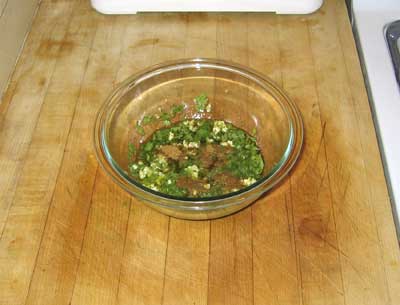
Next, add the ground cumin …
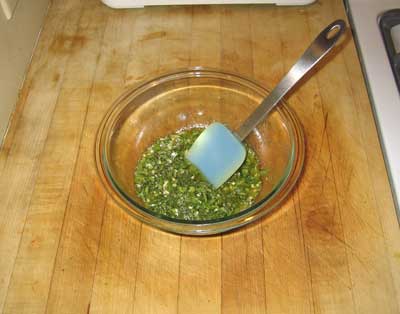
Mix everything together with a spatula. The marinade is now finished and we are ready to add the meat.
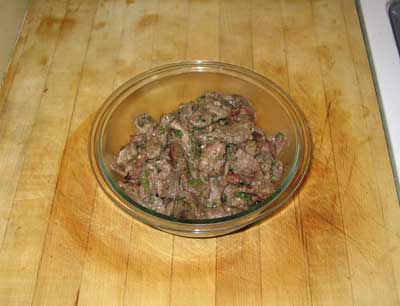
I like to use an electric knife because it is easy to slice the meat very thin. I will cut the meat into 1/4 inch slices, then cut the strips to about 1 inch wide by 3 inches to 4 inches in length. I am using Flat iron steak in this example, but you can also use skirt steak or flank steak.
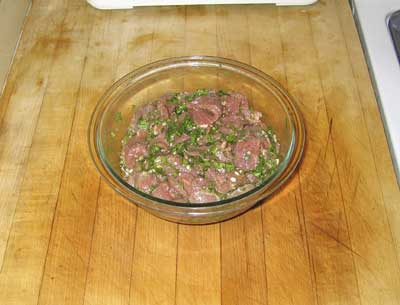
Add the sliced meat to the marinade and mix it all together so that all the meat is coated with the marinade. Cover and place in the refrigerator while marinading. Marinade the meat for at least a couple of hours. For best results, marinade overnight.
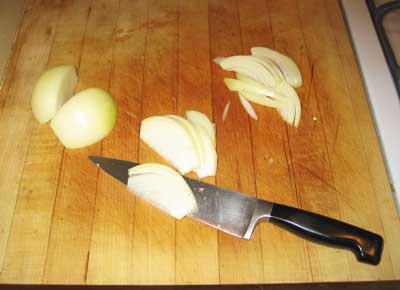
Next, slice the onions. Cut them in half first, then into quarters as you would normally slice an onion.

Instead of cutting the quartered onion cross-wise as you would normally slice an onion, slice them lengthwise into 3/8 inch strips as shown in the photo below.
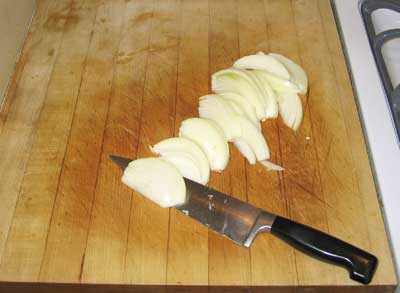
Slice them all up into 3/8 inch strips.
Next, slice the bell peppers. Start by removing the stem, then cut each pepper in half.
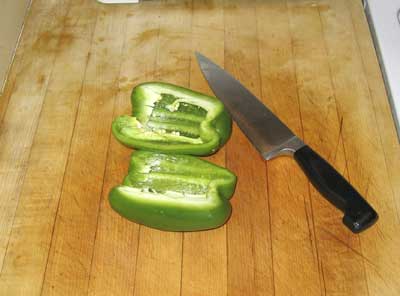
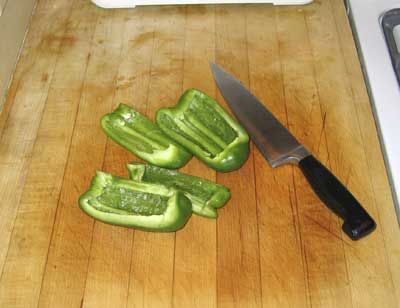
Cut them lengthwise into sections to make it easy to remove the ribs and seeds.
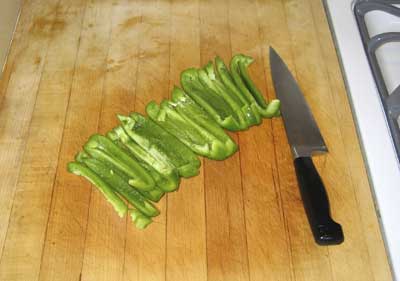
Then cut them all up into 3/8 inch slices (lengthwise) similar to how the onions were cut. If I am not cooking right away, I will put the sliced vegetables into a reclosable zip lock bag and put it in the refrigerator until I am ready to cook them.
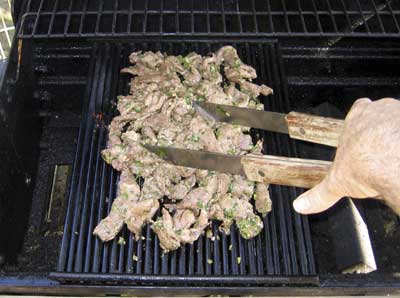
After the meat has marinated, cook it on a gas grill. Use grilling tongs to turn the meat. Notice how the grills are arranged. They are stacked one on top of the other with the top one upside down over the other. The grill bars are arranged in a staggered fashion in order to close the gaps so the meat doesn’t fall through the grill onto the flames.
While the meat is cooking, place all the sliced vegetables in a large skillet. It takes about 12 to 15 minutes to cook the meat and the vegetables, so you can cook them both at the same time.
When the meat is done, place it in a serving bowl.
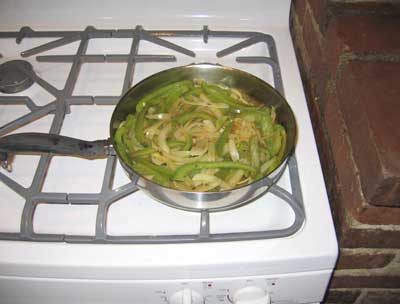
When the onions start to become translucent, the vegetables will be cooked. Place these in a separate serving bowl.
Serve immediately. I like to serve them with two flour tortillas, guacamole, sour cream and a little salsa. Serve with portions of cooked vegetables and meat. Optionally, serve with cooked pinto beans.
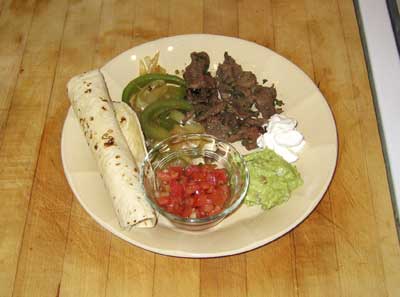
This is a very delicious and healthy meal and should be a big hit with guests.
Guacamole Recipe

This is a quick and easy recipe for guacamole that is also very healthy. Avocados, hot peppers and garlic have health benefits.
The most important thing is to use ripe avocados – not too soft and not too hard. If you buy unripened avocados, you can put them in a paper bag in a dark place for a few days and they will ripen. Guacamole is best served with tortilla chips or sliced celery or carrots.
Guacamole Ingredients:
- 2 ripe avocados
- 1 Roma tomato
- 1 Shallot
- 2 garlic cloves
- 1 lime
- 1 jalapeño pepper
- 3/4 tsp salt
Directions:
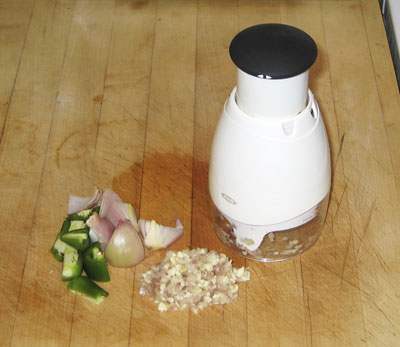
Mash the 2 avocados in a mixing bowl. Squeeze the lime juice with a citrus juicer and add it to the bowl. Peel the shallot and garlic cloves then finely chop them plus the jalapeño pepper with a chopper. Dice the tomato then chop the diced tomato with the chopper. Add all chopped ingredients to the mixing bowl. Mix thoroughly and add salt. Makes 2 cups of guacamole.
Shown below is a shot of all the ingredients in a mixing bowl. Note: If you see 2 shallots it is because they were small. Use one medium sized shallot.
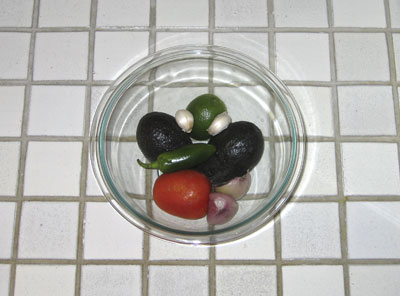
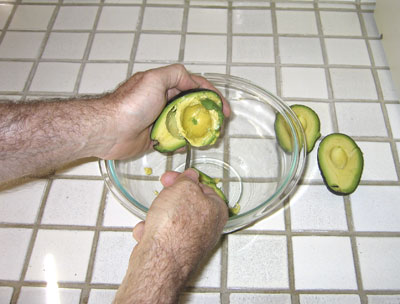
Start by cutting the avocados in half and removing the pits. Then spoon the avocados away from their peels into the mixing bowl.
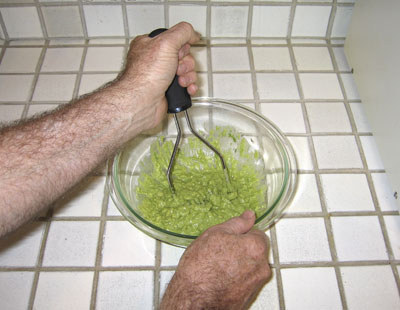
Mash them with a potato masher.
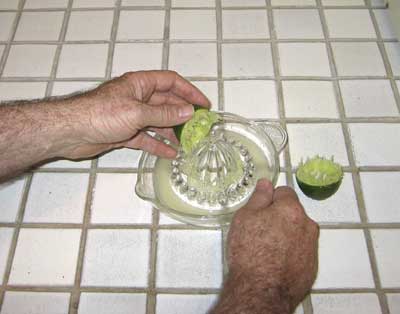
Juice the lime with a citrus juicer and add it to the mixing bowl. The lime will help prevent the avocados from oxidizing and will add flavor at the same time.
Slice the jalapeño pepper, shallot and garlic cloves into quarters, then chop them with a chopper.
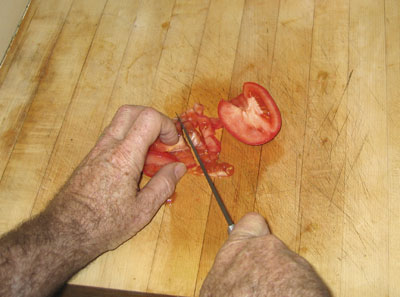
Dice the tomato, then chop the diced tomato with the chopper.
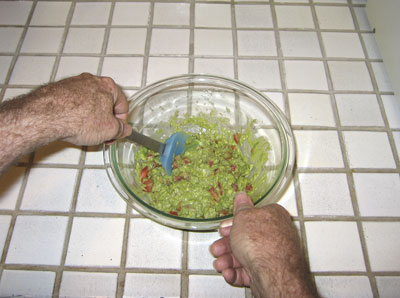
Add all the chopped ingredients to the bowl and mix with a rubber spatula.
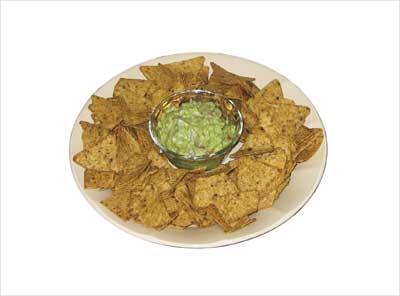
Serve with tortilla chips.
Best Deal on Curry Powder
 I’m on an Indian food kick so I have been using a lot of curry powder for cooking. Curry powder is readily available in most supermarkets, but, wow! Is it ever expensive! A small 2 oz. bottle of curry powder (Spice Islands brand) costs a whopping $7.50 at Gelson’s here in Southern California! Whole Foods Market actually had a better deal for about $5.50 (Spicely brand), but it is not always in stock.
I thought maybe I could find a better deal online. My wife found the best deal. Starwest Botanicals has organic curry powder in a 1 lb. resealable bag which we were able to get from Vitacost.com for about 9 bucks!
We buy a lot of vitamins and other botanicals from Vitacost.com so it was a no-brainer. It tastes good in the dishes we prepare, so we are very happy with it.
FDA Adds 28 Weight Loss Products To Unsafe List
On December 22, 2008, the FDA (Food and Drug Administration) added 28 products to its list of weight loss products it considers to be unsafe (ref: http://www.fda.gov/cder/consumerinfo/weight_loss_products.htm). This update is the second update to the original list, bringing the total number of products on the list up to 72.
The FDA is expanding its nationwide alert to consumers about tainted weight loss pills that contain undeclared, active pharmaceutical ingredients.
Some of the products added to the list are:
- 7 Day Herbal Slim
- Extrim Plus
- Imelda Perfect Slim
- Perfect Slim
- Slimtech
- Superslim
The unsafe products are on the list because they were found to contain harmful pharmaceutical ingredients. Some of the ingredients found were:
- bumetanide
- cetilistat
- fenproporex
- fluoxetine
- furosemide
- sibutramine
A December 22, 2008 press release from the FDA states that the health risks posed by these products “can be serious”, for example sibutramine, which was found in many of the products, can cause “high blood pressure, seizures, tachycardia (rapid heart beat), palpitations, heart attack or stroke” (ref: http://www.fda.gov/bbs/topics/news/2008/new01933.html).
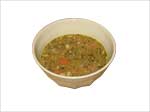
Turkey Soup
 This is a great recipe for turkey soup that you can make when roasting a turkey. Instead of throwing away the carcass, you can easily make this delicious and healthy soup. You can vary the amounts of the ingredients to make it brothy and light or more concentrated with more vegetables. It takes about 2 to 3 hours to make, so plan on a long day when roasting a turkey. You can either make this soup with the carcass alone, or you can completely de-bone the entire turkey and dice the meat for sandwiches and use all the bones.
Turkey Soup Ingredients:
- 1 carcass from a roasted turkey
- 1 – 2 lb carrots
- 1/2 – 1 lb celery
- 1 – 2 large onions
- 2 – 4 bay leaves
- 1 1/2 – 3 tsp thyme
- 2 – 4 cloves garlic – chopped
- 1 – 2 1/2 gallons water
- 1/4 – 1/2 tsp pepper
- 2 – 3 tsp salt
Directions:
When roasting a turkey, plan for making the soup with the carcass to avoid wasting it. When you begin carving the turkey, add water to a 1 to 3 gallon pot and place on stove and turn up flame to get water boiling. Note the range of ingredients and that you can vary the soup somewhere between a light, brothy style or a hardier style with more vegetables. You can make it to your liking. Simply add more or less ingredients according to the ranges in the ingredients list. Use the larger amounts of ingredients when using the larger amount of water (and a larger pot), or use fewer carrots, celery and onions with the larger amount of water for a brothier soup. Use the smaller amounts when a more concentrated variety is desired. Either way, it will be good.
When the water starts to boil, add the turkey carcass and all the bones to the heating water. Next, add the bay leaves. In the meantime, chop the carrots, celery and onion, then add the chopped vegetables to the water. Then add the thyme, pepper and salt. Cover and return to a boil, then lower the flame and keep it at a low boil for about 2 hours.
After a couple of hours, check the water level and add more water as needed to replace any that gets boiled off. Also check the meat on the bones. Somewhere between 2 1/2 and 3 hours, all the meat should be falling off the bones.
When the soup has finished cooking, use a pair of kitchen tongs to separate all the bones and place them into a strainer over a plate. After the bones have drained, pour the strained soup back into the pot, then separate all the meat from the bones and add it to the soup.
Shown below is a shot of all the ingredients: carrots, celery and onions, garlic cloves, bay leaves, thyme, salt and pepper.

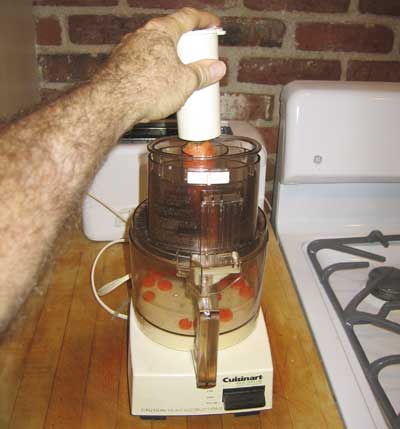
Add water to a pot, then turn on the flame to bring water to a boil. While the water is heating, chop the vegetables. I am using a food processor to speed things up.
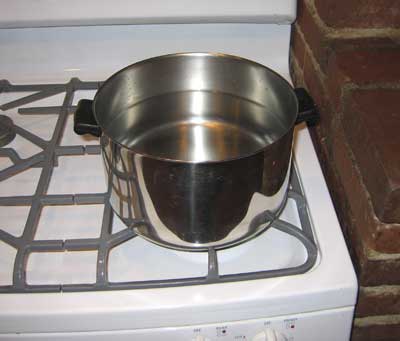
Shown below is a shot of the pot with the water before boiling.
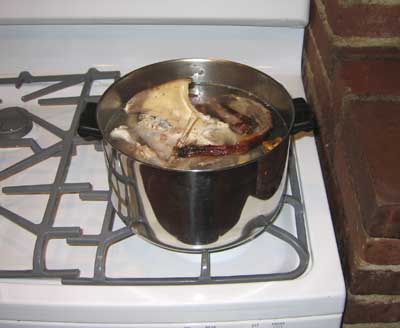
When the water begins to boil, add the carcass and all the turkey bones to the water. I added a little meat from the neck in this example…
Add all the vegetables, the chopped garlic and bay leaves to the water, then add the thyme, salt and pepper. Bring everything to a boil, then lower the flame to a low boil and cover and allow to cook for a couple of hours.
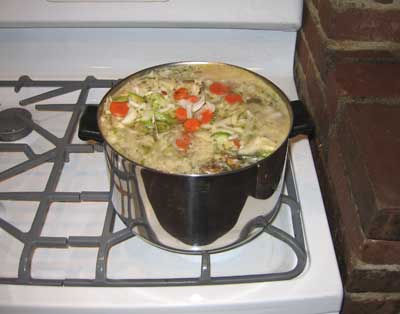
After a couple of hours, check the soup and see how the meat is softening on the bones. Add more water if necessary to replace any that gets boiled away. I usually have to continue cooking for another hour.
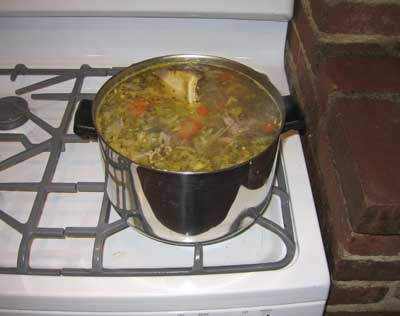
After an hour or so, check the soup again. It will be done when the meat is falling off the bones.
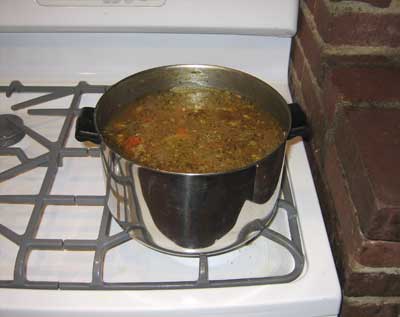
Turn off the heat and pull the bones out of the soup with some kitchen tongs. Place them into a strainer over a plate. Pour the strained soup back into the pot, then separate all the meat from the bones and add it to the soup. At this point you can also skim off the fat that floats to the top of the soup.

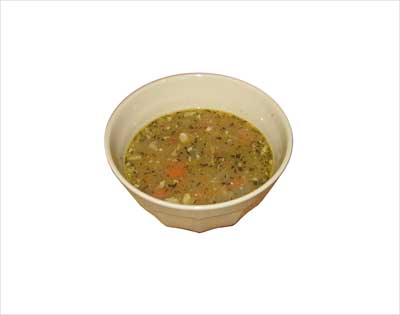
Use a soup ladle and serve hot. Store excess in 2 qt Mason jars in the refrigerator for later.